the garden project

Salad plantings

Also on my March planting list were green salad leaves. All of my preferred green salad leaves are cut-and-come-again types; from a permaculture perspective, that’s a more productive use of the soil as you can keep harvesting throughout the season rather than only getting a once-off harvest then returning to bare earth and having to replant. So I planted sorrel, endive, and rocket, to replace the rocket that’s been growing in the winter veg bed all winter and which will bolt soon.

I was also very pleased to discover a couple of bronze arrowhead seedlings (presumably self-seeded? I’m not sure!) springing up in the pot of my satsuma tree. Bronze arrowhead is one of my favourite lettuces, but I discovered too late that I was out of seed this year. I’ve transplanted the seedlings into the salad veg bed, as they and the satsuma want rather different water conditions, and they’re doing well.

Nothing is growing terribly fast yet, but as of a couple of weeks ago, this was the March-planted corner of my salad veg bed:

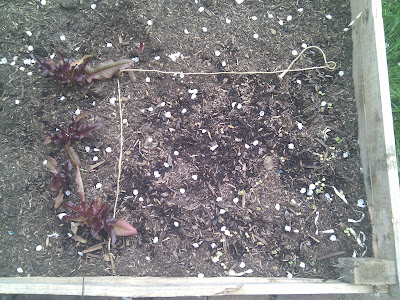
You can just about see the seedlings — sorrel and endive in the centre, rocket around the edges — between the cherry blossom fallen from next door’s tree; and the bigger and healthy-looking bronze arrowhead lettuces.

Last week, I planted the April batch of greenery in the next corner of the bed: a different type of oak leaf lettuce, and a batch of Mystery Mixed Lettuces from the Real Seed Company. I’ll be interested to see what I get from those!

activism, permaculture

Potatoes, babies, and tricycles

I decided to plan for a very low maintenance allotment this year, given that I also have a new garden and (rather more time-consumingly) a new baby to deal with. Over the winter, the main beds have almost all been mulched with a double layer of cardboard to reduce weeding. The next stage was to plant potatoes (low-maintenance but tasty!) through the mulch. So, only a couple of weeks late, we headed down to the allotment last weekend to get planting.

The mulch is doing its weed-reducing job where it’s been put down, but around the paths and edges the dandelions are in glorious but weedy profusion. I ignored them in favour of getting 50% of the potatoes in the ground before the baby got too grouchy. (I should note that I did not actually plant anything but was instead acting in more of a supervisory/baby-feeding capacity. Many thanks to my glamorous assistant doop.)

The trip also provided the opportunity for the first test of our baby-transporting device, chosen after researching seats and trailers/cargo bikes: a Christiania trike with a car seat strapped in. Glorious success! Leon slept peacefully all the way there, and observed thoughtfully most of the way back, until a cobbly patch near our front door upset his equilibrium.


The Christiania in action


Baby in a trike!

growing things, the garden project

Planting tomatoes for this year

It’s spring, so I’ve been doing a lot of planting in the garden. For once I actually have a month by month list, entered into my diary on a weekly basis, as the only way I’ll get things done on time while also wrangling a newborn. I feel alarmingly organised.

Last month was tomato-planting time, so I now have 5 pots of seeds sprouting away on the kitchen windowsill.

Two pots were from packet seeds (Lettuce Leaf, a bush type from the Real Seed Company, though it looks like they no longer stock them, and Peacevine Cherry, from a heirloom packet I got free) which I’ve liked in the past. All the seeds planted of both have germinated and are doing fine. The other 3 were seeds saved from last year’s plants; but only one of them has germinated, which I found a little disappointing.

It turns out that the problem is probably down to a cackhanded effort on my part to increase germination rates. If you’re saving your own seed, you can put the seeds in a jamjar with some water for 3 days, you can improve their germination speed. It turns out, however, that that is a strict 3 days – no more, no less. Five months in the jar? Not so good. Ah well; I have 9 baby tomato plants which is plenty, and will have to try seedsaving again this year. In fact last year’s plants started out at my old house and finished off at this one, so they might not have been the best-adapted to the new location anyway.

In other signs of spring: the apple tree has started to produce green shoots, after a couple of months of looking a lot like a stick.

That was taken a couple of weeks ago; there are more shoots now, all looking pleasingly healthy.

permaculture, the garden project

From pallets to shed

I spent much of February slowly constructing a shed (more of a tool cupboard, really; our garden is very small) from deconstructed pallets.

The first step was to measure up (my shed was 80cm x 60cm in footprint, and spade-height-plus-a-bit in height) and cut the pallet planks to size. I think I used about 2.5 pallets, and a hand-held circular saw (very very useful to speed things up).

I also needed four lengths of 2×2, one per corner, to attach the planks to. My design called for a sloping roof (so the rain runs off), so required two shorter lengths for the back, and two longer for the front. I nailed the back planks to the shorter lengths, and each set of side planks to one of the longer lengths (so at this point the side planks were braced only at one end).


The back wall, screwed into its 2×2 bracing at both ends of the planks.


One of the sides, with only one end braced. Note that its 2×2 rises above the planks; this is because it needed a triangular piece of planking attached later to allow for the slope of the roof.

The next step was to screw the loose ends of each side piece to the 2×2 bracing of the back piece.


Shed with three sides. Note again the space at the top of each side for a triangular piece. (Apologies for the sun flare in the photo!)


Shed corners screwed together.

I measured, cut, and attached triangular pieces for the top of each side (no photos, sorry). For the roof, I cut a piece of plywood which overlapped the sides by about 4-5cm in each direction. I intended to cover this with some thick black plastic left behind by our kitchen fitters, but my Dad came up instead with a roll of roof felt from in his garage, so I was able to do a more professional-looking (and longer-lasting!) job with that, roofing glue, and some roofing nails. Before covering the roof, I screwed in a batten at the back to keep it from sliding off.


The batten on the underside of the roof, and the roofing nails keeping the felt down. The felt was glued down on the topside of the roof.

Since installation, I’ve added a couple of battens at the front to keep it square and to brace the roof.

It still lacks a door (I’m on the look out for some large enough plywood), and at some point I will use a couple of L-shaped metal bits to attach the roof, rather than using bricks to hold it down. But as of now, it does the required job, and, given the high percentage of reused materials, for minimal financial or environmental cost. I’m also kind of proud that I built it at 38 weeks pregnant!

the garden project

Making things

Recently, I have been making things:

Rave baby! (Leon with his hands in the air, aged 1 day)

The second one took a bit longer, and is kind of still under construction.

Actually the shed is also still under construction, lacking as it does a door; it has however had front battens added since that picture. Construction post to follow. I’ve also got going with this spring’s planting in the raised beds over the last month — more to follow on that as well.